
today my cat Duzi has a "dentist appointment" and I'm a nervous wreck because she's in anesthesia and I'm so anxious :/
So I had to distract myself and made a quick tutorial on how to make a water marbel design!
As you may know, my lacquerista career started with a water marbeling tutorial on reddit, I started buying nail polish and more and more and more and more... yeah, I was instantly caught in a loop of buying polish and asking myself why? but that's ok, I know I'm not the only stupid one throwing my money out for this *looks at Bea* ;)
So let's start, shall we? :)

What you need:
- a plastic cup
- room temperature water (it has to be room temperature, otherwise it may not work)
- tape (scotch tape works best, but you could also use other types of tape)
- a toothpick, orange stick or other pointed things. I used a broken crochet hook :)
- nail polish from ONE brand (I tried using different brands at once but it didn't worked for me. Also newer creamy polishes which aren't dried are the best for this)
- small scissors
First step is painting your nails one coat of white. I used essie - blanc.

Now comes the tape. Take one longer piece and wrap it behind your nails, like this (please ignore the hair...)

Then take one smaller piece and place it just over your cuticles, but not over the white

Take your cream polishes and screw off the top, it's more handy, you gonna see why :)
I used China Glaze - Make Some Noise, What A Pansy and Four Leave Clover

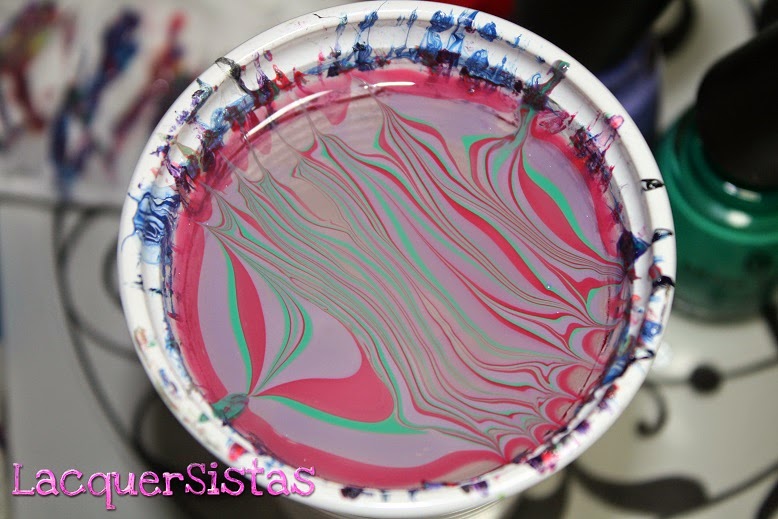
Now drop one polish behind the other into the cup. The polishes should spread on the surface of the water, like this. If it doesn't, than you had to either adjust the temperature of the water or switch colors.

that's how it shouldn't look like, it must spread nicely (green polish is CG - Grass Is Lime Greener, it has to much pigments in it so the polish dries instantly)

Now take your toothpick and carefully make a design. Just let your fantasy run free :)

but don't swirl to much, otherwise it looks like this

Here are some pictures of the proccess!
 |
| taped finger |
 |
| place it on the design |
 |
| finger in the water, then blow on the surface |
 |
| remove all the excess polish! |
 |
| now you see why you need the tape :) |
 |
| cut the tape with scissors, it's easy to remove |
 |
| yeah, marble magic <3 let it dry completely before adding top coat! |
 |
| the mess |
After the last drop, make one line from the middle to the top and one to the bottom, like this

Now you going to crisscross the polish back and forth really close
It should look like this

If you don't want it to be that sheer, than you have to take a few more drops :)
I recently found a really cute marble inspiration on instagram and I wanted to try it out :)
I cut a small heart in a piece of tape and put it over my nail

 |
| you can't really see it but you get the idea |
 |
| yeah :) |
And that's it :)
It's a little tricky and you have to play around a little bit. But it makes a ton of fun to make!
Feel free to ask me if you have any questions :)
I also recommend watching water marbeling tutorials from My Simple Little Pleasure on YouTube, she's a goddess and I learned so much from her <3<3
yours,
Dani <3
Keine Kommentare:
Kommentar veröffentlichen